Removing "Red Eye" with The GIMP |
 |
| by Eric Jeschke | |
| April 16, 2003 | |
|
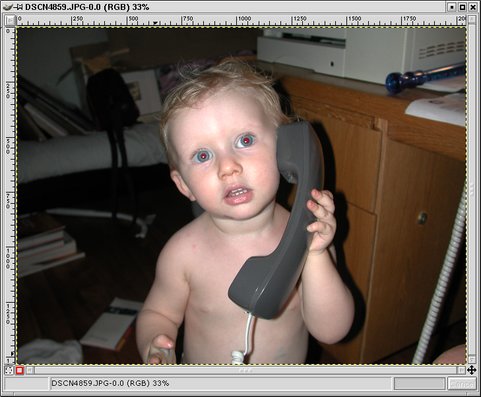
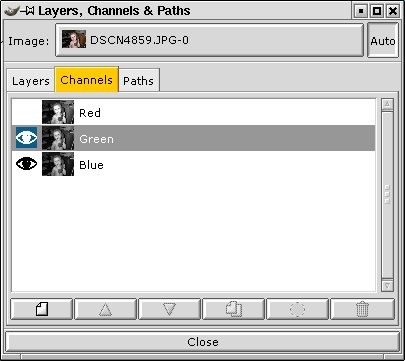
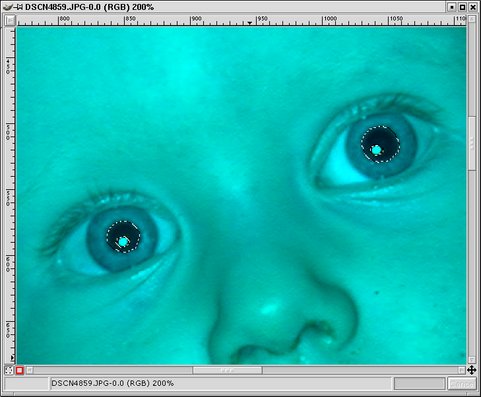
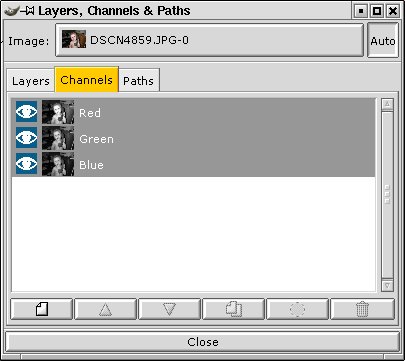
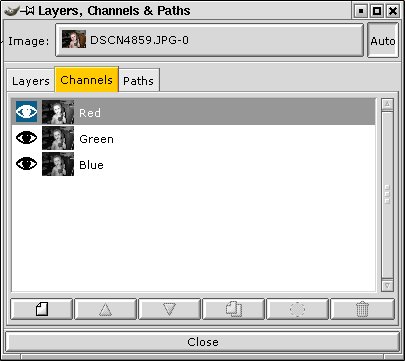
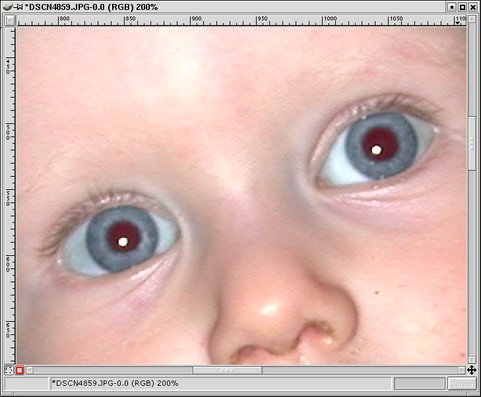
In this tutorial I'll show you how to do professional red-eye removal for flash pictures using The GIMP. It gives excellent results: eyes maintain the full catchlight and proper tonalities; something you don't necessarily get with other "simpler" techniques. The basic procedure is to use the fuzzy select tool to select the pupils, then apply the channel mixer to drastically reduce the red channel component. Note: Astute readers may notice that I had earlier written up a much more involved tutorial on this that you can find here. I still believe the earlier technique gives excellent results. However, this new method is so much faster and is just as good or better, especially if you use a quick mask to clean up your selection (see below). The Procedure Here is the original example image, loaded into The GIMP. Cute kid, cute snapshot. Gotta get rid of those red eyes! Once you've got your image loaded, zoom in (+) close. We want to select the pupils. There are a number of ways to go about this, but one that I've found that seems to work fairly well is to use the fuzzy select tool ( To get the best selection, I'm going to apply it only to the channel that has the best contrast between iris and pupil. Usually this is the green channel. Bring up the Layers dialog (Ctrl+L) and click on the Channels tab. Turn off visibility for the Red channel by clicking on the "eye" next to it. Then deselect the Red and Blue channels by clicking on them. The Layers dialog should look like at right, with only the Green channel highlighted. Double-click the fuzzy select tool (
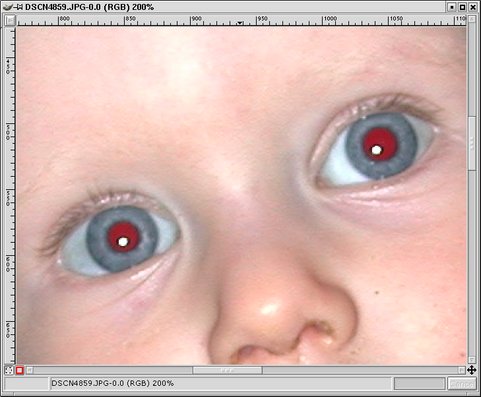
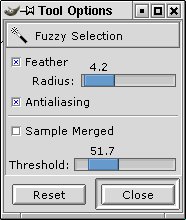
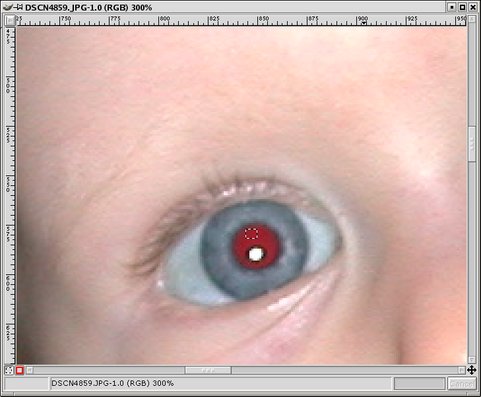
Now click on the red part of one pupil. You should see it select most of the pupil. If it doesn't, clear the selection (Shift+Ctrl+A), increase the Threshold value slightly and try again. Conversely, if areas outside the pupil are selected, clear the selection, reduce the Threshold and try again. Tip: Consider using the Grow Selection (Select/Grow) and Shrink Selection (Select/Shrink) dialogs to slightly enlarge or decrease the selection if it looks mostly right, but you are a few pixels off either way. Once you've got a decent selection on one pupil, hold down the shift key and click on the red part of the other pupil. Now you should have both pupils selected, as shown. Tip: if you know about quick masks, you can fix up an imperfect selection here by clicking on the quick mask button, applying a few appropriate paint strokes with a small, fuzzy brush, and then going back to selection mode. Go back to the Layers dialog, turn on visibility of the Red channel and select the Red and Blue channels, as shown at right. You should still see your "marching ants" selection in the image window.
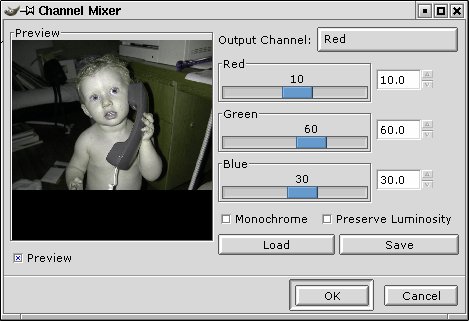
Now bring up the Channel Mixer (Filters/Colors/Channel Mixer). (ed. note: if you don't see the channel mixer, skip to the "I can't find channel mixer" section) You'll want to mix down the Red channel significantly and boost Green. I use settings of Red 10%, Green 60% and Blue 30%. You may need to experiment to see what gives you the most realistic pupil, but this is a good starting point. See the tutorial on converting color images to B&W for more information on this useful filter.
When you have the mixer settings to your liking, click OK. You can toggle visibility of your selection (Ctrl+T) to examine the results. Don't forget that the selection is still active even though it is invisible! If you want to try another mix, Undo (Ctrl+Z), toggle the selection visibility back (Ctrl+T) and run the same filter again (Shift+Alt+F).
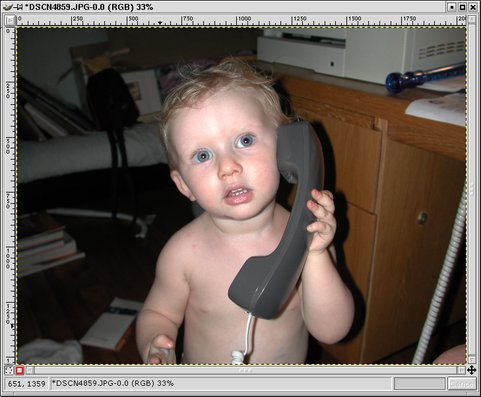
That's it! Zoom out (-) to see your handiwork. When you are satisfied with the results, deselect everything (Ctrl+Shift+A). I can't find channel mixer! Some older versions of the gimp don't have the channel mixer plug-in. If you don't have it, not to worry! If you find that you don't have the channel mixer plug-in, just make the selection as described above, then go back to the Layers dialog (Channels tab), make sure only the Red channel is selected, and then desaturate (Image/Colors/Desaturate).
I prefer the channel mixer myself, but desaturating the red channel produces almost indistinguishable results, as you can see.
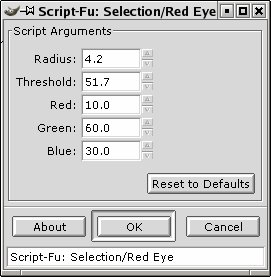
I should point out that compiling and installing the Channel Mixer plug in is not difficult, however. You can get it here from the GIMP Plug-in Registry. Simply unpack, do a ./configure, make and then copy the resulting channel_mixer executable to your GIMP plug-ins directory (e.g. ~/.gimp-1.2/plug-ins/). (ed. note: Instructions for compiling the plug-in are for Unix/Linux users only) Can't you automate this? Yes! Thanks to Martin Guldahl, author of the Channel Mixer plug-in, who sent me this excellent script he wrote to automate the procedure described above. Download the script and move it into your GIMP scripts directory (e.g. ~/.gimp-1.2/scripts/). To use it, simply select a few pixels in the red region of one pupil (e.g. draw a small outline with the rectangle selection tool), then run the script (Script-Fu/Selection/Red Eye). Fill in the parameters, which correspond to the ones described in this tutorial and click OK.
If the result is not satisfactory, Undo (Ctrl+Z) and retry the script with different parameters. Repeat with the other pupil. The same script also provides a second option (Script-Fu/Selection/Red Eye Desaturate) that uses the red channel desaturate technique described above and thus does not require the channel mixer, if you don't have it installed. Further Reading on Red Eye
Note: This tutorial was written by Eric Jeschke and was originally published at http://cs.uhh.hawaii.edu/~jeschke/photography/articles/gimp/RedEye2/ Have a question? Need help? Get free, friendly person-to-person help with your computer questions or spyware questions in our help forums! |