Burn MP3 to CD Using Adaptec Easy CD Creator 4 |
 |
| by Don Walker | |
| February 29, 2004 | |
|
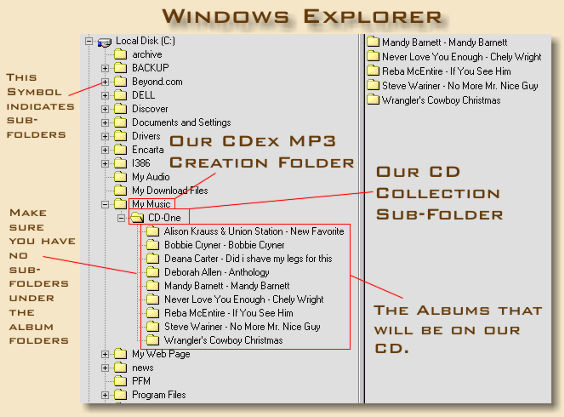
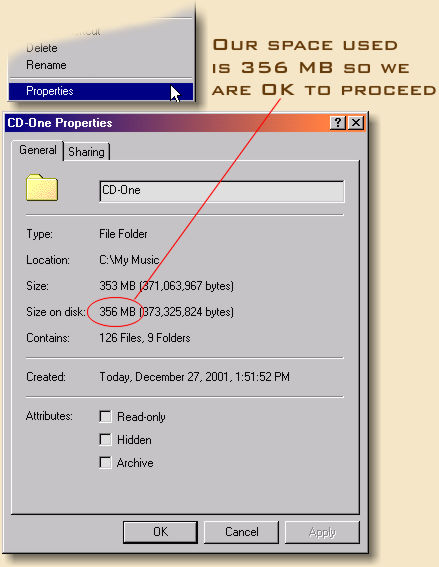
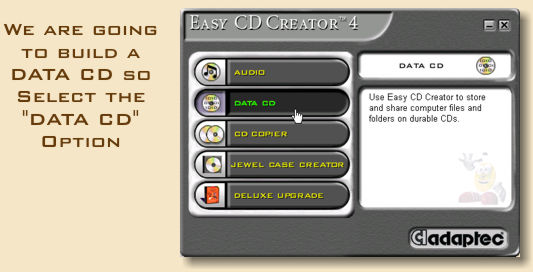
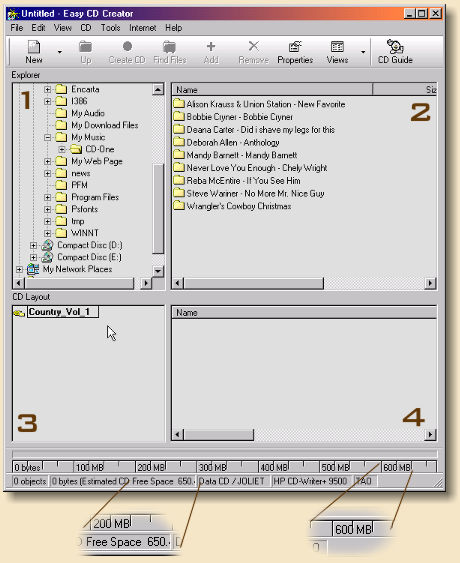
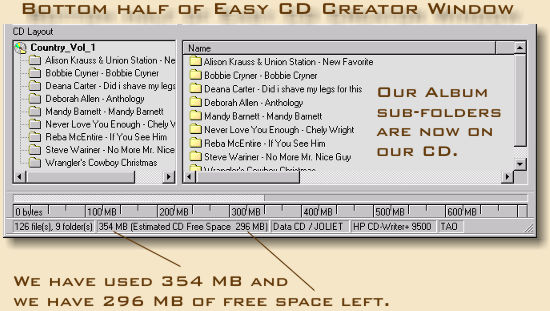
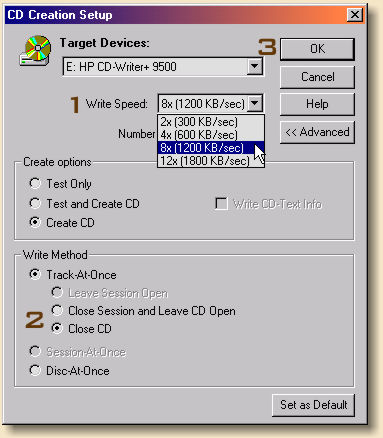
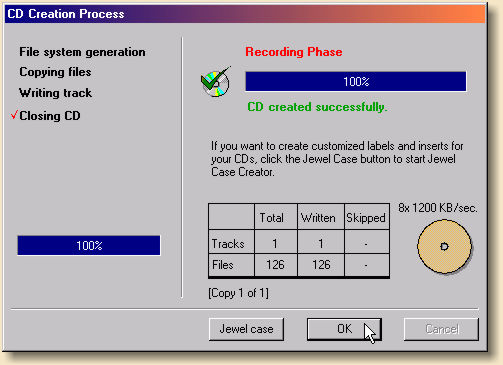
Now you are ready to burn a copy of your MP3 files onto a CD. There comes a time when you will not be able to keep all of your MP3 song files on your hard drive due to limited space. This will be the time when you will have to archive your MP3s to CD. This tutorial will walk you through this process. COLLECT YOUR ALBUM FILES Here we will look at Windows Explorer as our collection tool. Windows Explorer is my most used program in my computer. It allows me to see that content of my hard drive and it allows me to move, copy and delete files. In this operation we will us it to do the following: Step 1. See the image below. In the CDex MP3 creation folder (C:\My Music) create a sub-folder called "CD-One". This is done by "Right Mouse Clicking" on the "My Music" icon and selecting "New Folder" from the pop-up menu. Type the name "CD-One" and your new folder is created in the "My Music" folder. Step 2. Now copy all of the folders containing your albums into the "CD-One" folder. You can do this by dragging and dropping or by "Right Mouse Clicking" on the album folder and select "Copy" from the pop-up menu then "Right Mouse Clicking" on the "CD-One" folder and select "Paste" from the pop-up menu. Make sure that you do not have any sub folders under the album folders (see below). Step 3. After you have copied your album folders into the "CD-One" folder we will need to measure the amount of disk space used by your "CD-One" folder. This is done by "Right Mouse Clicking" on the "CD-One" folder and selecting "Properties" from the pop-up menu. (see below) BURN CD: Above is the "Easy CD Creator" greeting menu. Select "DATA CD" and you will get the program option for burning Data CDs. These CD can only be read by a computer or MP3 players that read CD-R disks. Below is the screen that will appear. In the above screen you will make all preparations for burning a Data CD. Here is what each Window contains. Now I want to give you a step by step procedure to follow in burning a Data CD. Take note that at the bottom of the "Easy CD Creator" window you can tell how much space on the CD you have used and how much you have left to use. I always try to fill up the CD to the maximum but this time I am going the leave 296 MB on the CD blank. You will get the following dialog box. Now you will instruct "Easy CD Creator" how to create your CD. Once the CD have been created you will see the following dialog box. Click on the "OK" button and proceed to Step 4 where we will check the CD using "Windows Explorer". Step 4. Now we need to check our CD and make sure we can read the data before we delete the files from the hard drive. With the our new CD in the CD-ROM drive open "Windows Explorer" and go to the CD-ROM drive on the left window and in the right double click on any song file and make sure it plays in your default MP3 player. Step 5. If it plays then you are free to delete the "CD Collection Sub-Folder" and all of it's contents. That contents is now on our CD. This concludes this tutorial, now go back to the CDex Main Page. Don Walker of Simputer Consulting has graciously given permission for Help2Go to reprint this tutorial. Have a question? Need help? Get free, friendly person-to-person help with your computer questions or spyware questions in our help forums! |