CDex Tutorial #2 : Setting Up |
 |
| by Don Walker | |
| February 29, 2004 | |
|
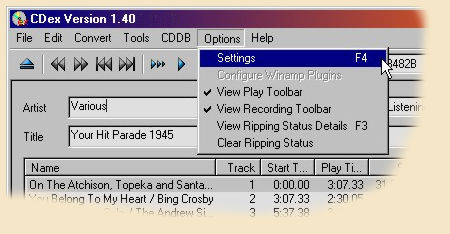
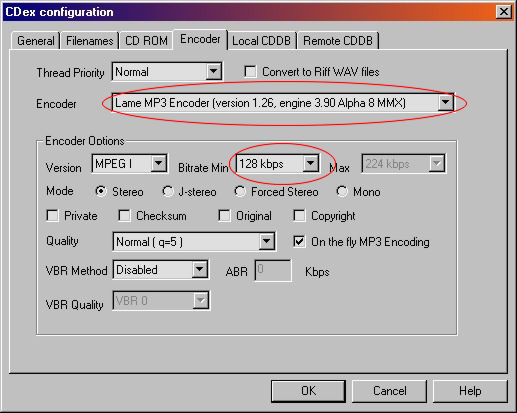
Set up the CDex Configurations 1. Select "Option" menu then select "Settings" to go to the "CDex configuration" dialog (Short-Cut key "F4"). 2. On the “Encoder” tab make sure the Encoder window has the Lame MP3 Encoder set and the “Bitrate Min" is set to “128 kbps”.
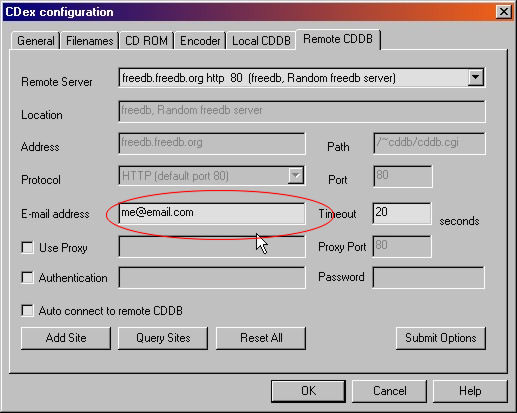
3. Click the “Remote CDDB” tab and enter your email address (or a made up email address) in the “E-mail address” box.
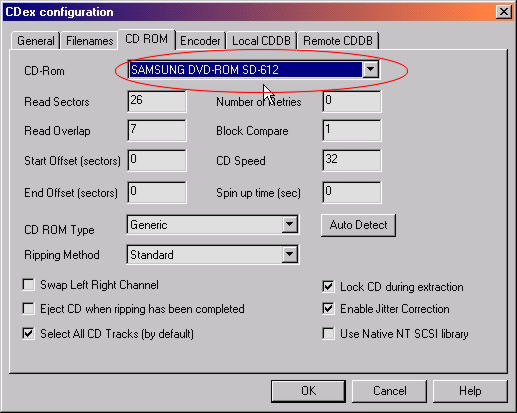
4. Click the “CD ROM” tab and make sure your CD-ROM drive is selected.
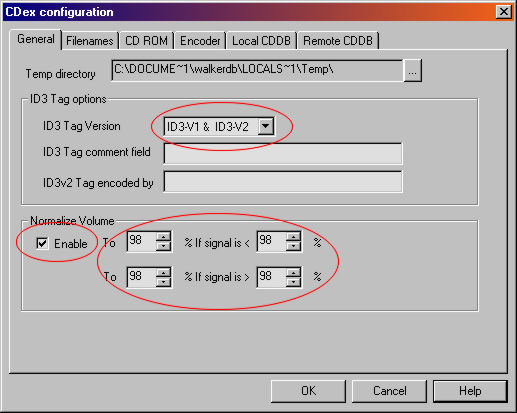
5. Now select the "Generals" tab.
Here is where we will instruct CDex to normalize or set the volume of your sound files to a common volume. I do not like to have to constantly adjust the volume between songs on a CD and I am sure that you do not either. So, CDex gives us a tool to use for normalizing the volume. It does this by looking at the sound file as a whole for the loudest volume. Then the file is adjusted to make the loudest sound to your percent setting of 100% of volume. I use 98%. Now, using the above image set your "Normalize Volume" to 98 in all four boxes. And also check the "Enable" to instruct CDex to normalize your files using your percent settings. Let's also change the ID3 Tag option. An MP3 file can contain text data giving information about the song. These are called "Tags" and come in two versions. The "ID3-V1" is old and limited but supported by all players. The "ID3-V2" can contain more data but some players may not support this format and if they do not then your MP3 file will not play on that player. I have not seen a player that is not capable using the "ID3-V2" so I always include them in my MP3 files. So, as shown in the above image set the "ID3 Tag Version" to both "ID3-V1" and "ID3-V2". You might notice the two boxes below this option. They will allow you to add a constant text note in each of your MP3 files. But notice that the "ID3-V2" is the only version that supports the "Tag encoded by" field.
6. Now close the "CDex configuration" dialog by clicking on the "OK" button and go back to the CDex Main Page and go to the next lesson. Have a question? Need help? Get free, friendly person-to-person help with your computer questions or spyware questions in our help forums! |