CDex Tutorial #7 : Convert WAV Files to MP3 |
 |
| by Don Walker | |
| February 29, 2004 | |
|
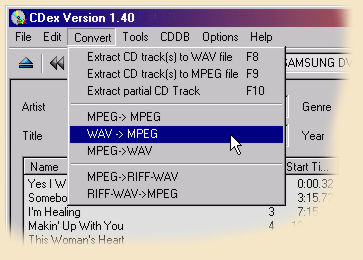
1. Open the "Convert Menu" and select the "WAV -> MPEG" option.
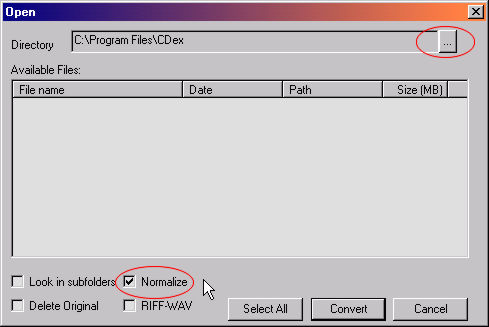
2. Now you will see the dialog box below. You will notice that the "Normalize" button is turned on. This is because we set it to on in the "Settings" dialog. CDex will normalize all files that it creates until you uncheck the box. But do not. What the dialog is asking you to do is point to the WAV file that you want converted to MP3. So click on the button that has the 3 dots (...) and a "Browse Folder" dialog will open (See below).
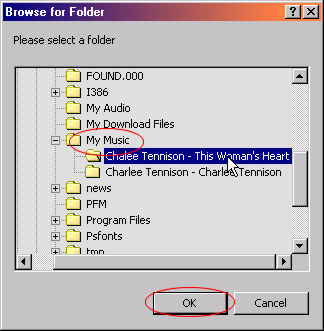
3. In this dialog you should open and close folders until you find the folder that contains your WAV file. Then select the "OK" button.
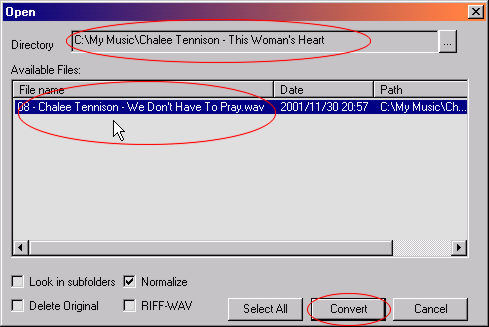
4. Now in the "Open" dialog you can see all of the WAV files that are in the folder that you selected.
5. Notice that your chosen folder is displayed in the "Directory" box and your WAV files are displayed in the "Available Files" list. Now, click on the file name and select the "Convert" button. The dialog below will be displayed.
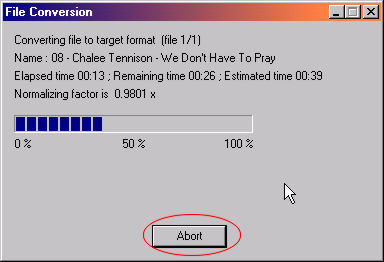
6. You can see in the process dialog that your file is being created. If you change your mind you can hit the "Abort" button and cancel the process without any file being created. NOTE:
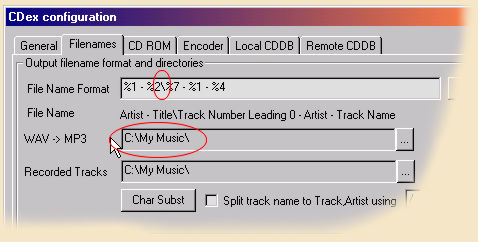
As you can see, there is a "\" in the "File Name Format" box. This will cause files created from Music CDs to be place in a sub-folder. Now look at the "WAV -> MP3" box. This entry causes CDex to place all of the MP3 files that you create from WAV files in that folder (c:\My Music). Maybe in future updates the author of CDex will add the same functionality in the "WAV to MP3" that is in the "CD-Track to MP3". This may be hard since there is no "Artist Name" and "Album Title" to use in naming the folder. So let's just wait and see what happens. 7. Now you can use Windows Explorer and move the MP3 file to whatever folder you wish to keep it in. 8. That concludes this lesson, now go back to the CDex Main Page and select the next lesson. Have a question? Need help? Get free, friendly person-to-person help with your computer questions or spyware questions in our help forums! |